Buyer’s Guide: Heated Floor
Buyer’s Guide: Heated Floor
Winter’s here.
Snowflakes are dancing from the sky. And your feet are literally freezing. Your heating system is failing to warm your home, all the while making an annoying noise.
Do you know what you’re missing?
A floor heating system, one that spreads warmth as gentle and embracing as the sun on a Caribbean beach. The dream, right? This heating system is so worth it, and we’ll explain why!

Will You Love Your Heated Floor (Hint: YES!)
Love at first try! One may think that a floor heating system is only luxury spending.
But it’s actually a game–changing feature for most people.
Why? Simple.
It provides:

Uniform heat dissipation for unrivalled comfort. Don’t worry about frozen toes ever again!

An energy-efficient solution. This heating system, especially if it’s your primary heating system, can lead to electricity savings of up to 15%. The room temperature can be lowered by 2 or 3 degrees without any loss of comfort.

Space optimization, ideal for smaller rooms.

A quiet and hidden heating source.

A safe installation, even for children.

Healthier air quality, reducing allergy sources (yay!), since there is no release of air blowing dust around.

Life warranty (under certain conditions, of course!) Fun fact! Did you know that a horse and a floor heating system have about the same lifespan? We’re talking between 20 and 30 years.
Will You Love Your Heated Floor (Hint: YES!)
Love at first try! One may think that a floor heating system is only luxury spending.
But it’s actually a game–changing feature for most people.
Why? Simple.
It provides:
Uniform heat dissipation for unrivalled comfort. Don’t worry about frozen toes ever again!
An energy-efficient solution. This heating system, especially if it’s your primary heating system, can lead to electricity savings of up to 15%. The room temperature can be lowered by 2 or 3 degrees without any loss of comfort.
Space optimization, ideal for smaller rooms.
A quiet and hidden heating source.
A safe installation, even for children.
Healthier air quality, reducing allergy sources (yay!), since there is no release of air blowing dust around.
Life warranty (under certain conditions, of course!) Fun fact! Did you know that a horse and a floor heating system have about the same lifespan? We’re talking between 20 and 30 years.
What Are the Compatible Flooring Options
Floor heating systems cannot be installed with any flooring. Ranked in terms of effectiveness, here are the best floor coverings:
- Ceramic, THE ideal coating because it conducts heat better. (Psst! Get 10% off your floor heating system with the purchase of ceramic tiles at La Tuilerie.)
- Vinyl and linoleum
- Glue-down engineered wood flooring
- Floating floor
- And carpet.
Read our full article on the best flooring options for a floor heating system to learn more.
Before purchasing a floor heating system, make sure your selected flooring type is compatible. Some restrictions may apply.


Where Can it Be Installed
Are there rooms best suited for a floor heating system?
The easy answer is no.
Although an entryway, an office or a bathroom are the first rooms that may come to mind, any room can benefit from a heated floor. You’ll love the comfort it provides just as much in your living room, your kitchen, or even your playroom.
A heated floor can be used as either the primary heating system or as a supplemental heating source. Each project is unique: seek advice from our in-store experts for personalized guidance.
How Much Does It Cost
We offer two brands of floor heating systems:
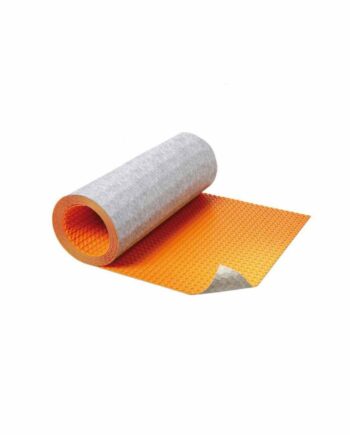
- Schluter: the top brand for installation products, Schluter is a German company known by all handymen for their products. They have a DITRA-HEAT membrane estimator.
What Is a Heated Floor Made of
If you’re handy, you can install a heated floor. All you need is your methodical skills and the proper tools. A floor heating system is mainly composed of a membrane, heating wires and one or several heating thermostats.
The uncoupling membranes are used for installing the heating cables and serve the following functions: decoupling, waterproofing, vapor management, and providing good load support/distribution.
There are two cable spacing methods:
- standard (every 3 studs)
- or alternating (2–3–2 studs). This method increases heat output (higher wattage per square foot), thus heating efficiency.
To learn more on how to install your floor heating system, ask our experts in store

Shop Our Membranes
-
Sale!
DITRA HEAT membrane
Starting at 28.03$Starting at 25.23$ -
Sale!
DITRA HEAT DUO Membrane
Starting at 41.97$Starting at 37.77$

In Quebec, most heating cables are electric (not hydraulic).
Make sure to choose the appropriate voltage according to your electrical system.
Here are a few things you are probably wondering.

How to measure the length of your heating cable?
You don’t need to install heating cable on your entire tiling surface. In fact, you should:
- Measure your total room area.
- Measure and deduct:
- The area covered with attached objects (such as a shower, vanity, toilet, cabinets, etc.)
- The minimum safe distance to respect (such as walls, partitions, heat sources, drains, etc.)
- Calculate the final heating surface:
Heating Surface = Total Room Area – (Area Covered with Attached Objects + Minimum Safe Distance)
- Select the heating cable length that is the closest to your final measure, WITHOUT exceeding that measure. Heating cables cannot be cut, so make sure to opt for a shorter length than needed.
A clear and precise plan of your room allows for more accurate cable length measurement. Our advisors can help you calculate the required length once your room measurements are taken.
Should you install heating cables underneath an Italian shower, a freestanding bathtub or a vanity?
Heating cables should not be installed beneath a non-self-supporting bathtub or beneath furniture.
They can however be installed underneath a vanity, only if it’s a floating cabinet. Leaving a space for ventilation is mandatory to prevent overheating.
Electric wires can also be installed underneath a tile-based shower (not one in acrylic). And we strongly recommend using two separate cables: one for the shower and one for the rest of the bathroom. This way, you can still operate your room floor heating system if something breaks in your shower system without risking waterproofing issues. Plus, don’t forget that a heating floor in a shower makes repairs more complex.
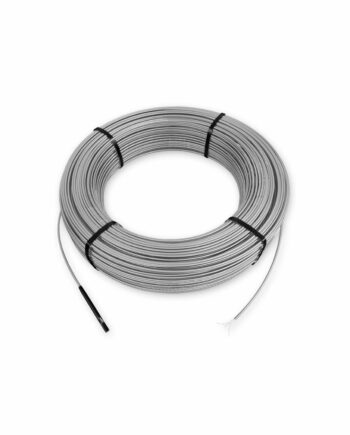
How many electric wire coils do you need?
We normally use one coil of heating cable per room. For bigger rooms, you can combine more than one coil using a power module. Heating cables are sold in predetermined length. You must NEVER cut it or alter it in any way, or overheating may occur.
So, you absolutely need at least one heating cable coil and one thermostat in every room.
Here are some installation tips:
- Make a detailed plan before you get started.
- The heating cable coil cannot be returned once the packaging has been opened, so make sure to get the right length, for example using a cord or rope. Cut the cord to the exact length of your heating cable, and install it on your uncoupling membrane, as you would do with your electric wire. This will validate the length and spacing installation.
How many electric wire coils do you need?
The amount of heating wires used depends on the size of the room and the capacity of the thermostats.
Typically, a single coil of heating cable is used per room. For very large rooms, you may need to combine 2 wires on the same thermostat. You won’t require a power module as long as it doesn’t exceed 15 amperes. If it exceeds 15 amperes, then you will need a second thermostat or a power module if you want everything to be controlled by the same thermostat.
Heating cables are sold in predetermined length. You must NEVER cut it or alter it in any way, or overheating may occur.
So, you absolutely need at least one heating cable coil and one thermostat in every room.
Here are some installation tips:
- Make a detailed plan before you get started.
- The heating cable coil cannot be returned once the packaging has been opened, so make sure to get the right length, for example using a cord or rope. Cut the cord to the exact length of your heating cable, and install it on your uncoupling membrane, as you would do with your electric wire. This will validate the length and spacing installation.
Where should you install the cable heat probe?
Each heating cable features two heat probes (or sensors). It is recommended to install both probes even if you only plan to connect one of them to the thermostat.
The sensor should be placed in a strategic location. If it is installed in an area where direct sunlight constantly hits it, the heated floor system may not turn on. Conversely, if it’s placed in a colder spot, such as too close to an exterior wall, the floor heating may run continuously. Avoid positioning it in a place where an object is always placed (laundry basket, shower mat, etc.).
The probe must be placed towards the centre, at equal distance between two heating cables. If the sensor is too close to the cable, the wire will reach the set temperature too fast.
Each room requires its own thermostat, and each thermostat is connected to a probe. This allows for effective temperature management, whether it’s for the floor or the room, depending on your setup.
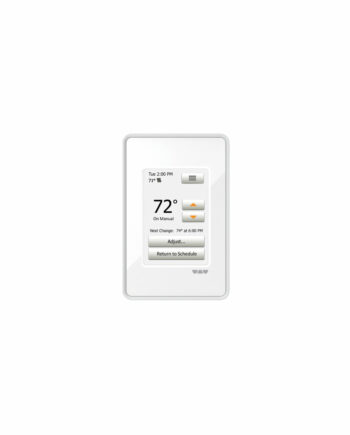
You can choose among 4 types of thermostats:
- Wi-Fi programmable
- Touch-screen programmable
- Push-button programmable
- Non-programmable
Shop Our Thermostats
-
Sale!
DITRA HEAT touchscreen thermostat
274.69$
The uncoupling membranes are used for installing the heating cables and serve the following functions: decoupling, waterproofing, vapor management, and providing good load support/distribution.
There are two cable spacing methods:
- standard (every 3 studs)
- or alternating (2–3–2 studs). This method increases heat output (higher wattage per square foot), thus heating efficiency.
To learn more on how to install your floor heating system, ask our experts in store
Shop Our Membranes
-
Sale!
DITRA HEAT membrane
Starting at 28.03$Starting at 25.23$ -
Sale!
DITRA HEAT DUO Membrane
Starting at 41.97$Starting at 37.77$
In Quebec, most heating cables are electric (not hydraulic).
Make sure to choose the appropriate voltage according to your electrical system.
Here are a few things you are probably wondering.
How to measure the length of your heating cable?
You don’t need to install heating cable on your entire tiling surface. In fact, you should:
- Measure your total room area.
- Measure and deduct:
- The area covered with attached objects (such as a shower, vanity, toilet, cabinets, etc.)
- The minimum safe distance to respect (such as walls, partitions, heat sources, drains, etc.)
- Calculate the final heating surface:
Heating Surface = Total Room Area – (Area Covered with Attached Objects + Minimum Safe Distance)
- Select the heating cable length that is the closest to your final measure, WITHOUT exceeding that measure. Heating cables cannot be cut, so make sure to opt for a shorter length than needed.
A clear and precise plan of your room allows for more accurate cable length measurement. Our advisors can help you calculate the required length once your room measurements are taken.
Should you install heating cables underneath an Italian shower, a freestanding bathtub or a vanity?
Heating cables should not be installed beneath a non-self-supporting bathtub or beneath furniture.
They can however be installed underneath a vanity, only if it’s a floating cabinet. Leaving a space for ventilation is mandatory to prevent overheating.
Electric wires can also be installed underneath a tile-based shower (not one in acrylic). And we strongly recommend using two separate cables: one for the shower and one for the rest of the bathroom. This way, you can still operate your room floor heating system if something breaks in your shower system without risking waterproofing issues. Plus, don’t forget that a heating floor in a shower makes repairs more complex.
How many electric wire coils do you need?
We normally use one coil of heating cable per room. For bigger rooms, you can combine more than one coil using a power module. Heating cables are sold in predetermined length. You must NEVER cut it or alter it in any way, or overheating may occur.
So, you absolutely need at least one heating cable coil and one thermostat in every room.
Here are some installation tips:
- Make a detailed plan before you get started.
- The heating cable coil cannot be returned once the packaging has been opened, so make sure to get the right length, for example using a cord or rope. Cut the cord to the exact length of your heating cable, and install it on your uncoupling membrane, as you would do with your electric wire. This will validate the length and spacing installation.
How many electric wire coils do you need?
The amount of heating wires used depends on the size of the room and the capacity of the thermostats.
Typically, a single coil of heating cable is used per room. For very large rooms, you may need to combine 2 wires on the same thermostat. You won’t require a power module as long as it doesn’t exceed 15 amperes. If it exceeds 15 amperes, then you will need a second thermostat or a power module if you want everything to be controlled by the same thermostat.
Heating cables are sold in predetermined length. You must NEVER cut it or alter it in any way, or overheating may occur.
So, you absolutely need at least one heating cable coil and one thermostat in every room.
Here are some installation tips:
- Make a detailed plan before you get started.
- The heating cable coil cannot be returned once the packaging has been opened, so make sure to get the right length, for example using a cord or rope. Cut the cord to the exact length of your heating cable, and install it on your uncoupling membrane, as you would do with your electric wire. This will validate the length and spacing installation.
Where should you install the cable heat probe?
Each heating cable features two heat probes (or sensors). It is recommended to install both probes even if you only plan to connect one of them to the thermostat.
The sensor should be placed in a strategic location. If it is installed in an area where direct sunlight constantly hits it, the heated floor system may not turn on. Conversely, if it’s placed in a colder spot, such as too close to an exterior wall, the floor heating may run continuously. Avoid positioning it in a place where an object is always placed (laundry basket, shower mat, etc.).
The probe must be placed towards the centre, at equal distance between two heating cables. If the sensor is too close to the cable, the wire will reach the set temperature too fast.
Each room requires its own thermostat, and each thermostat is connected to a probe. This allows for effective temperature management, whether it’s for the floor or the room, depending on your setup.
You can choose among 4 types of thermostats:
- Wi-Fi programmable
- Touch-screen programmable
- Push-button programmable
- Non-programmable
Shop Our Thermostats
-
Sale!
DITRA HEAT touchscreen thermostat
274.69$

How To Install A Heated Floor
If you wish to install your heated floor yourself, you can watch videos from our supplier Schluter.
Make sure to achieve a proper and secure installation.
How To Install A Heated Floor
If you wish to install your heated floor yourself, you can watch videos from our supplier Schluter.
Make sure to achieve a proper and secure installation.
How to install an electric heated floor system DITRA-HEAT in a shower.
What Else Should You Know
Finally, here are 2 more things you should absolutely know.

Once the installation is complete, it will become impossible to drill through the tiles without damaging your floor heating system. If you ever need to install a door sill, for example, using an adhesive will be your best option.

Also, as for any electrical system, electrical connections must be done by a professional. Working with a qualified electrician ensures you stay safe (and is often required by insurance companies).
For any questions, contact our advisors. They will be more than happy to assist you in your project.
What Else Should You Know
Finally, here are 2 more things you should absolutely know.
Once the installation is complete, it will become impossible to drill through the tiles without damaging your floor heating system. If you ever need to install a door sill, for example, using an adhesive will be your best option.
Also, as for any electrical system, electrical connections must be done by a professional. Working with a qualified electrician ensures you stay safe (and is often required by insurance companies).
For any questions, contact our advisors. They will be more than happy to assist you in your project.